This option allows users to manually import claims, patients, and appointments from their EMR/EHR into CollaborateMD as interface messages.
Who can import files?
Users with the Import permission. Only files in CSV (.csv, .txt), Excel (.xlsx, .xls), TSV (.tsv, .txt), and Pipe-delimited (.txt) formats are supported in these steps. For HL7 or 837 imports, visit our Import HL7 or Import ANSI 837 Help Articles.
- Select Interface > Import.
-
Select your file format Comma-Separated (CSV), Excel, Tab Separated (TSV), or Pipe-Delimited from the dropdown.
-
Click the Import button.
-
Locate the file(s) you want to import from your computer.
-
Select the Files.
 Ensure that the header row describes the data in each column (or the import will fail). If any changes are needed, cancel the process and edit the file(s).
-
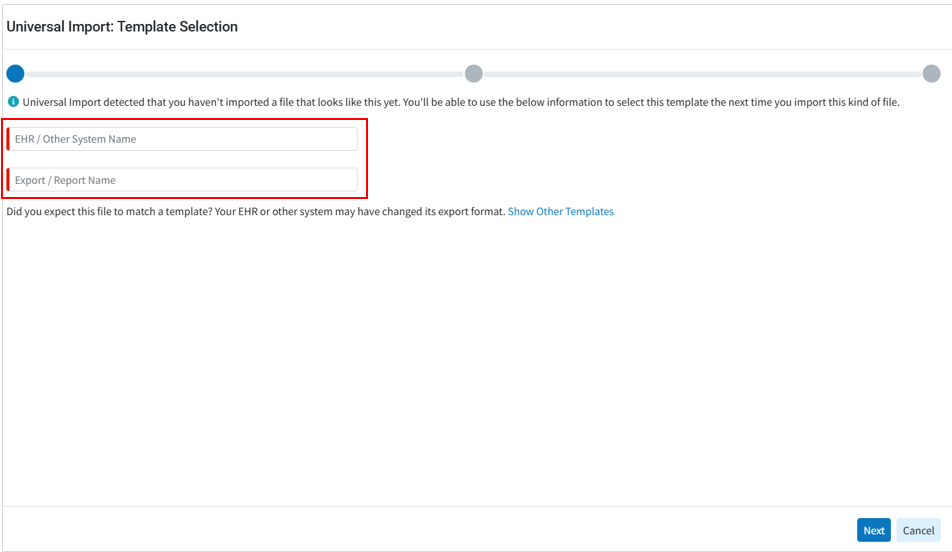
If you have never uploaded a file from this software/template: Enter the EHR/Other System Name (name of the Software where the file is coming from) and the Export/Report Name (name of the report or export used for the data).
-
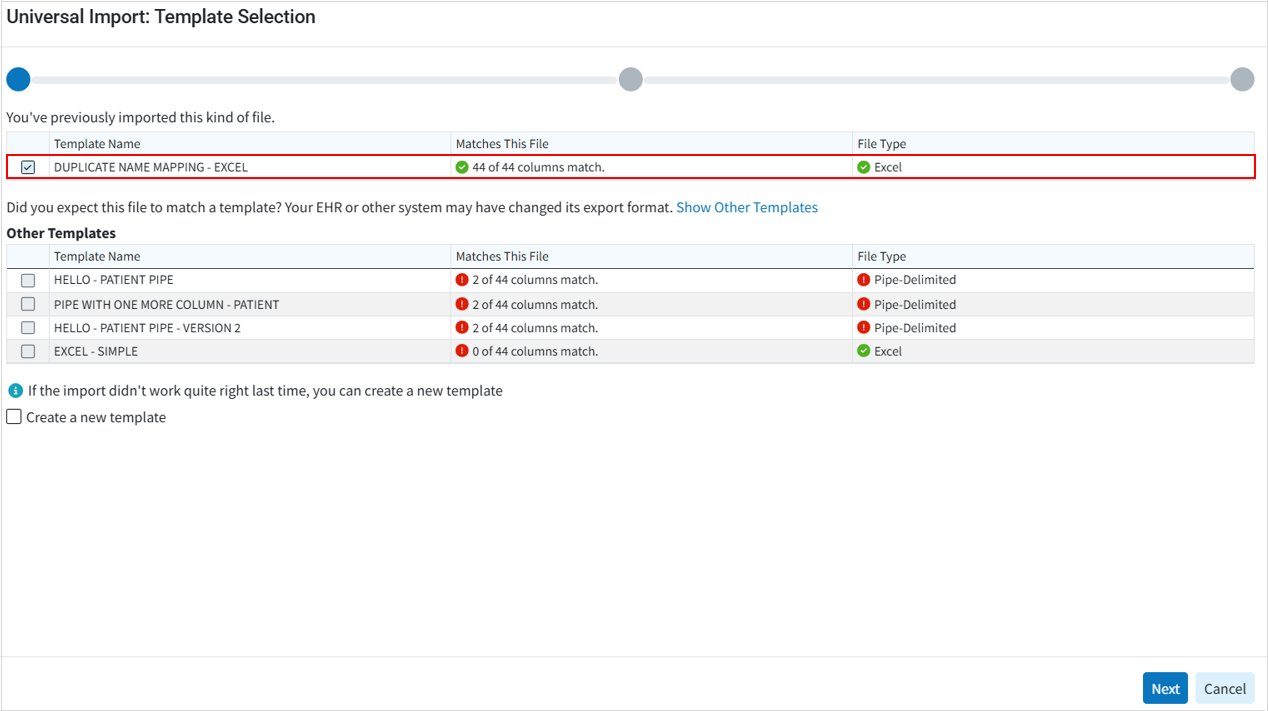
If you have previously imported from this kind of file/template: The system will automatically match the template/format with an existing one from your list.
-
-
Verify the format and click Next.
-
Verify the imported information in the corresponding tabs (Patient, Provider, Facility, Payer, Claim, Charges). If any data was not imported correctly, adjust the column names in the imported file and try again.
 If information that is the same across all records is missing , such as a shared DOS, Provider, Diagnosis, Procedure, or Revenue Code, the "Fix" button allows you to enter these details directly during the import process, eliminating the need to modify and re-import files. The "Fix" option applies only when the updated data is identical for all claims imported from the file (i.e. same DOS, Diagnosis, Procedure, etc.). If the missing information varies, update the import file before re-uploading.
 -
Optional: Click the "Fix" button, and enter the DOS, Rendering, Diagnosis, Procedure, or Rev Code that will be used for all the imported claims.

-
Verify your Unmatched Columns tab to ensure no relevant data remained mismatched.
Click Import.
-
Click Close.
Once the import is done, click Review Results. to view the imported files in Interface Tracker.Important: The system will upload each of the files and process them as interface messages. Any errors or warnings will be available within Interface Tracker. For more information on retrieving and troubleshooting messages in interface tracker, visit our Interface Tracker Help Articles.
 Ensure that the header row describes the data in each column (or the import will fail). If any changes are needed, cancel the process and edit the file(s).


