Follow the instructions below to create a payment plan for an estimate balance.
 If the Estimate was created from a Claim, open the claim in the claim section and continue to step 4.
Select Appointments > Scheduler.
Type in the patient name or comment related to the appointment in the Search for appointments by patient or comment field. Or click the Advanced Search field and use the filters to narrow down your search.
When the appointment(s) is displayed, right-click on the appointment and select Edit Appointment or click on the appointment and select the Edit button.
Locate and click Estimate from the right-hand side panel.
Click

Verify the estimate amount and select one of the 2 options:
If there are no existing charges to associate to this payment plan: The Payment plan will only be associated with the Estimate.
If there are one or more existing charges that this payment covers: The Estimate Payment Plan will be associated with a charge.
Enter the payment plan amount.
Click Continue.
Generate Payment Plan Installments, due dates, and the amount due for each installment.
 A maximum of 200 installments can be added to a payment plan.
 To Auto Generate installments, configure the following options:
First Payment Plan Date: Select the due date of the first payment.
Use the Payments Due every drop-down menu to specify the frequency of the payment due date.
Select one of the following options to auto-generate installments:
- Each Installment Amount: Enter the expected payment amount that will be due for each installment. Select this option for the system to automatically calculate the number of installments.
Each Total Number of Payments: Select this option to have the system automatically calculate the amount due based on the number of installments you enter.
Last Payment Date: Select this option to have the system automatically calculate the number of installments and amount due until the date you enter.
Click Generate Installments.
The installment amount, due date, and description will appear and can be modified by clicking in the corresponding column.
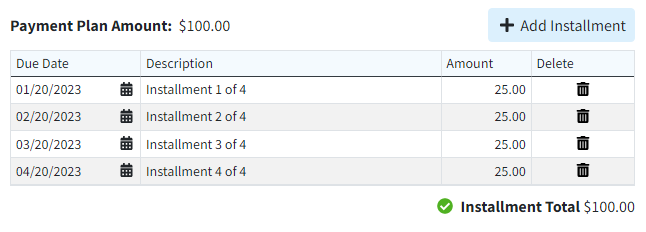
To Manually Generate Installments, complete the following:
Click the Add Installment button.
Enter the Installment Due Date and Amount Due until you have entered all installment dates and amounts.
Click Continue.
Review your payment plan details.
Write a description about this payment plan for other users to reference.
Use the Practice drop-down menu to select which practice the payment plan should report under.
Optional: Place a check in the Set up Auto Pay checkbox to set up Automatic Payments for the payment plan installments.
Click Save.
Check the Cardholder has consented to Auto Pay box.
Click Next.
If a card was previously saved, you have the option to “Use a saved card” otherwise select “Use a different card.”
Click Save.
Enter the card information and check the “Save my payment information for next time” checkbox.
Click Save.
 If the patient’s account type is not set to “Payment Plan”. You will have an option to update the account type to “Payment Plan”.
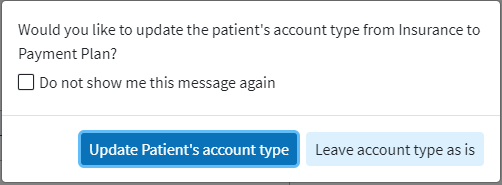


 If the patient’s account type is not set to “Payment Plan”. You will have an option to update the account type to “Payment Plan”.
 Don't want to worry about collecting patient payment for each installment date? With the patient's permission, enable Auto Pay so you never miss out on a payment plan payment again. Visit our Enable Auto Pay for a Payment Plan Help Article for detailed steps.