Creating a Shared Contact Group allows you not only to send messages to groups but also to share those groups across your organization. This enables employees working on specific tasks (e.g., denials or collections) to ensure timely notifications are sent to the appropriate individuals.
Who can create Contact Groups?
Users with the Contacts permission set to Access, Modify, and Share can create new shared contact groups or edit their own.
Auth Reps and Admins can edit any Shared Contact Group.
-
Select Home > Messages.
-
Find the Contact Groups tab and click Add.
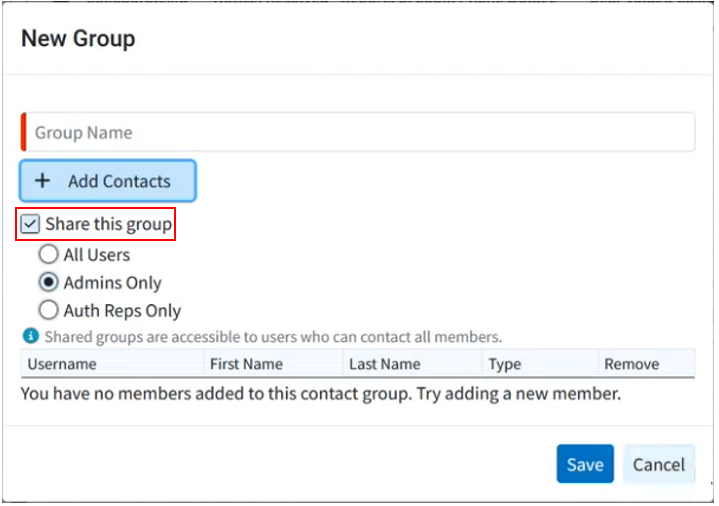
Add a name for the new group.
-
Check the Share this group box.
-
Select who to share it with (All Users, Admins Only, or Auth Reps Only) or click Add Contacts to manually add contacts to your group.
 When using the "Select Contacts" option, the contacts will be sorted by their respective customer, and it includes a search field for easier navigation.
 -
Optional: You can manually remove any users from your list with the "Remove" option.
-
Click Save.

 When using the "Select Contacts" option, the contacts will be sorted by their respective customer, and it includes a search field for easier navigation.