The Claim Settings contain options that change certain functionality when creating or editing claims. Some settings are specific only to your user while others impact all users in the customer. The Claim Settings for Customer contains options that will apply to all users under the customer.
Real-Time Claim Submission (RTCS) Settings.
This setting gives you on-demand visibility into your claim for tens of thousands of clearinghouse edits on an individual or batch claim level. Validating claims using RTCS means less claim rework, and accelerated reimbursements so you get paid faster. Enabling this feature is highly recommended based on the benefits.
Select Claim > Settings.
Click the Edit button.
Optional: Click the Copy Settings link to copy the current settings to another customer associated with your account.
Use the drop-down menu to determine the action that happens when a claim is set to send to insurance via clearinghouse:
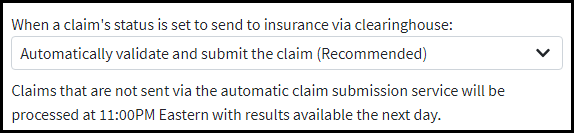
Automatically validate and submit the claim (Recommended): This option will give you real-time claim results along with real-time claim status. Rejected Claims will be set to “Rejected at Clearinghouse”. Accepted Claims will be set to “Claim at Insurance”. Results and statuses will be visible within Claim Tracker.
Automatically validate, but do not submit the claim: This option will allow you to obtain real-time claim results, however, claim statuses will not be updated in real time. Claim statuses will remain at “Send to Insurance via Clearinghouse” until we automatically batch process claims at 11:00 PM Eastern Standard Time.
Do not validate or submit the claim automatically: This option will disable RTCS. Claim statuses will remain at “Send to Insurance via Clearinghouse” until we automatically batch process claims at 11:00 PM Eastern Standard Time. Claim results along with claim status updates will not be available until the next day within claim tracking.
Click Save.

Fee Schedules Settings
This setting allow you to control what price is used on a charge in the event that more than one option could apply based on the fee schedules created for your customer. These changes apply to ALL fee schedules created for your customer account.
Select Claim > Settings.
Click the Edit button.
Use the drop-down menu to determine the type of Fee Schedule pricing for Institutional claims based on the: HCPCS Code or Revenue Code.
 By default, the system will always use HCPCS Code prices on Institutional claims. However, if you wish to base prices for Institutional to always be based on Revenue Code prices, click on the drop-down menu and select Revenue Code.
When multiple fee schedules apply to a claim based on their associations, the fee schedule used will be determined by the following order of precedence you select: Click on the association to highlight it and select the up or down arrow or right-click the association and select “move up” or “move down” to change the order of precedence.
Click Save.
 By default, the system will always use HCPCS Code prices on Institutional claims. However, if you wish to base prices for Institutional to always be based on Revenue Code prices, click on the drop-down menu and select Revenue Code.
Charge Total Amount
Select Claim > Settings.
Click the Edit button.
Allow users to override the charge total amount?
If set to Yes, the user will be able to override and the edit the charge "Amount" column on a claim.
You also need to place a check in the box to "override the total charge amount" under Charge Options on the Charges tab to override the total charge amount. 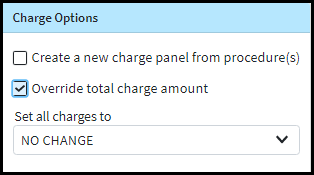

Automatically Apply Copays
Enable setting to automatically apply an unapplied copay credit when the claim is saved if the Date Of Service (DOS) matches.
Select Claim > Settings.
Click the Edit button.
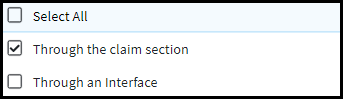
Use the “Automatically apply unapplied copays when claims are entered:” drop-down menu to select when to apply an unapplied copay credit based on if the claim is created via the claim section, or via an interface.
Click Save.
