This workflow will provide the necessary steps in CMD and Updox for creating a custom intake form.
-
Select Account Administration > Services.
-
Click the button next to Intake Forms.
-
From the Forms Options tab, click Open Updox.
-
Click Menu > Admin > Form Management.
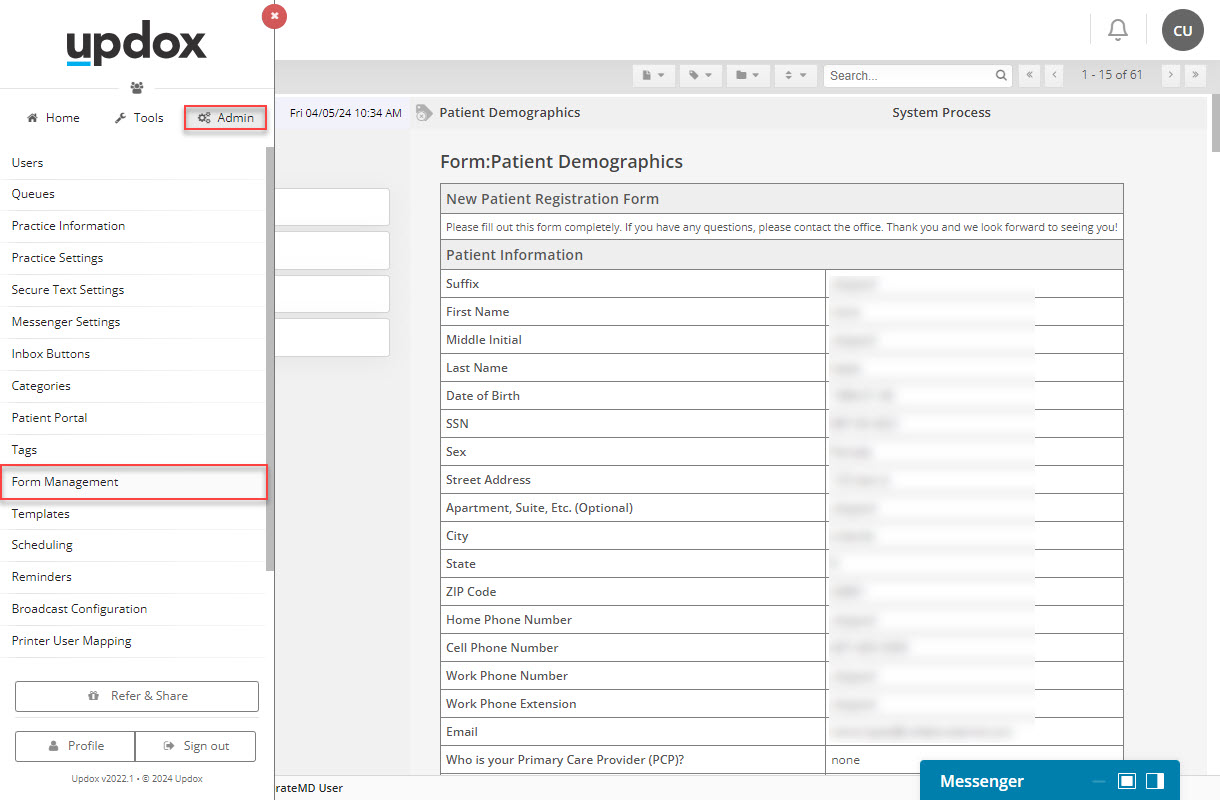
-
Select an existing form (basic form) as a template and click Duplicate Form or select Add New Form.
-
Enter your form name.
-
(Optional) enter your Auto tag and Submit to.
-
Click Add New Field.
-
Within the Field Editor, select the field Type (dropdown, checkbox, radio button, single-line text, etc.).
-
Enter the Label(field name).
-
Select the EHR Key (this field will match the data entered with the field in the patient section in CMD).
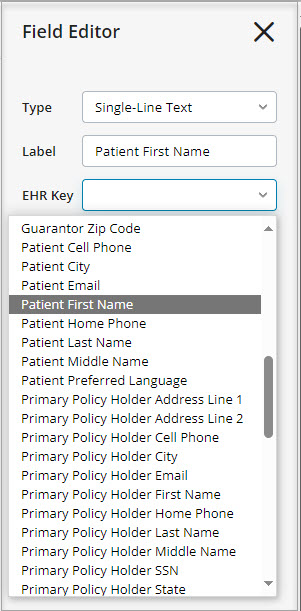
-
Select if you want the field to be required by checking the box (Name and DOB fields must be included in all forms and set as required).
-
Optional (add a description for the field).
-
Continue adding more fields as needed (steps 8-13).
-
Click Save.
 It is best practice to save your progress regularly since navigating away from your editor screen will cause any unsaved changes to be lost.
 -
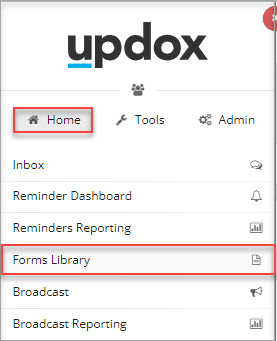
From the Menu screen, navigate to Home > Forms Library.
-
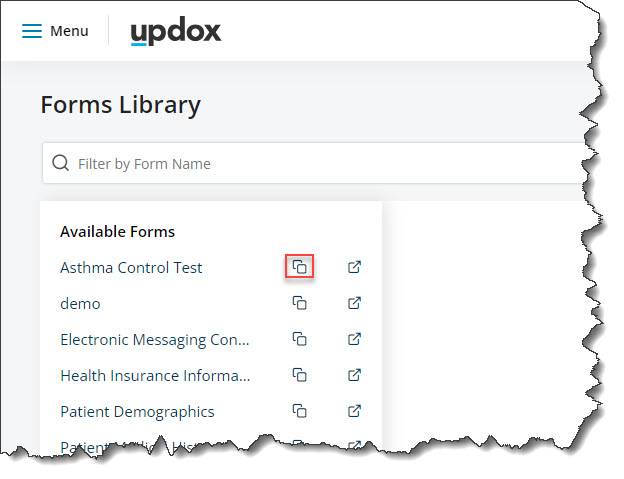
Find the form and click the "Copy forms link to clipboard" icon to copy the form's URL.
-
Return to the Forms Options tab in CMD (step 3).
-
Scroll down and enter the Form Title exactly as shown in Updox.
-
In the Form URL field, paste the URL copied in step 17.
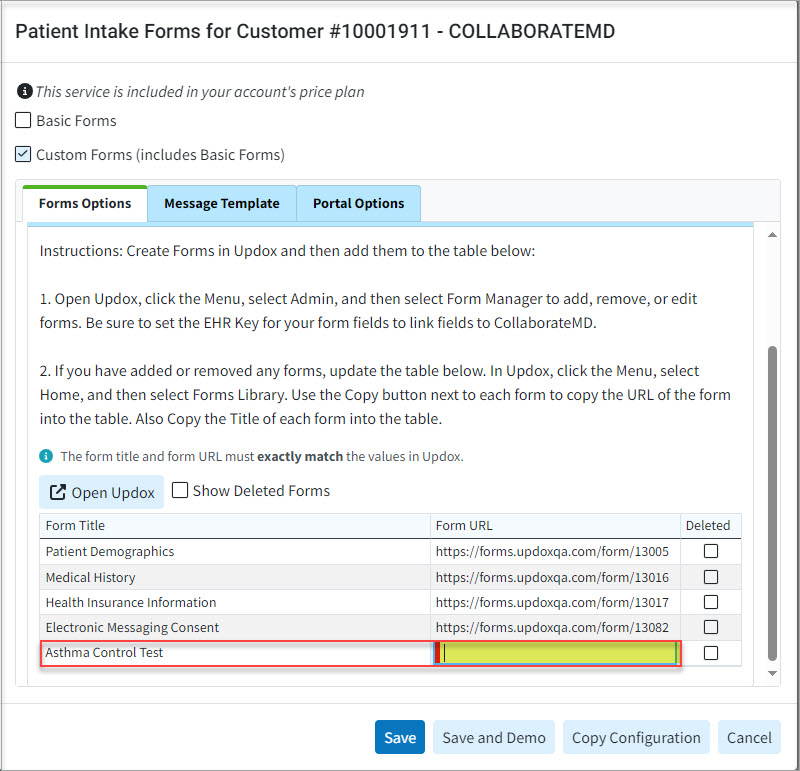
Please note that it is important that the user correctly enters the form title, and copies the form URL for each new form.
-
Click Save.


 It is best practice to save your progress regularly since navigating away from your editor screen will cause any unsaved changes to be lost.

