You have the ability to create and use your own custom Appointment Types.
-
Select Appointments > Configuration… > Appointments Types
-
Click the New Type button.
-
Enter a 1 to 10 digit alphanumeric identification code in the Code field to help the office staff identify the appointment type at a glance.
-
Write a brief Description of the appointment type.
-
Select the Icon and Color you would like to associate with this type.
-
Select the appointment type Length (i.e., duration in minutes).
-
Choose an option to “Make Appointment Type Available in:”
-
All Departments (Global): Select this option if you're using departments within your appointment scheduler and you want all your departments to be able to use this resource/type.
-
Specific Department(s): Select this option If you only want this resource/type to be available for scheduling to one or more specific departments. You must also click on the drop-down menu to specify the department(s).
-
-
Disable automatic appointment reminders for this appointment type: Place a check in this box to disable future phone reminders etc.
 Once disabled, patients scheduled with this appointment type will not receive calls to remind them of their appointment.
 -
Specify the hours of operation for this appointment type: Place a check in this box to specify the hours of operation for the appointment type. Specifying days and times will help manage your appointment scheduler to ensure appointments are being scheduled during business hours. For example, You want to allow appointments to be scheduled only between 8:00 am to 5:00 pm.
 Leaving this box unchecked means there are no restrictions when creating appointments for this appointment type.
-
After checking the box, click on the Add button and to select a Day followed by the beginning and ending hours for that day. Continue selecting the Add button to add more weekdays until you've added all of the days and times for the resource.
-
To remove a day, click on the red Remove button to the right of the row you want to remove.
-
-
Optional: Set your Claim Defaults for claims created through the Scheduler.

-
Place of Service: Enter the default Place of Service (POS) for this code manually or by clicking on the magnifying glass and choosing from the list of options.
-
Type of Service: Enter the Type of Service (TOS) for this code manually, or click the magnifying glass and choose from the list of options.
 Any POS or TOS codes entered as claim defaults within appointment types will have priority over other claim defaults selected elsewhere. If no default POS or TOS codes are selected, it will automatically default to POS 11 or TOS 1 on the claim.
  Visit our Claim Defaults Priority Rules Help Article for a detailed list of the order of precedence of claim defaults.
-
- Optional: Set your Default Codes for claims created through the Scheduler.
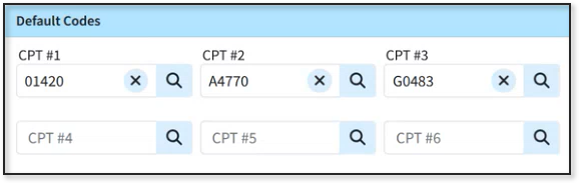 Default codes set on appointment types will be used when creating claims for that appointment type from the appointment section.Any default codes set within appointment types will have priority over patient default procedure codes for claims created from the appointment scheduler. Claims created from the claim section will still use patient defaults.
 - Click Save.
 Once disabled, patients scheduled with this appointment type will not receive calls to remind them of their appointment.
 Leaving this box unchecked means there are no restrictions when creating appointments for this appointment type.
 Any POS or TOS codes entered as claim defaults within appointment types will have priority over other claim defaults selected elsewhere. If no default POS or TOS codes are selected, it will automatically default to POS 11 or TOS 1 on the claim.
  Visit our