There may be instances where you need to modify the payer on an ERA if the wrong payer was selected (e.g. Secondary Payers, Refund/Reversals, etc.). When ERAs are loaded, CollaborateMD will store any possible “alternative” payers on the check, allowing users to edit and select an alternative payer while posting the ERA.
Select Payment > ERA.
Enter your Search Criteria.
Click the Search button.
Optional: Click the
 icon to edit your search criteria.
 Sort your search results. Visit our Reorder Table Columns Help Article for detailed steps on how to hide, rearrange or add header columns.
Optional: You are also able to interact with an ERA by right-clicking in the row.
Copy: Copy the selected row’s information to your clipboard.
Start/Continue Review: Start or continue reviewing the ERA to apply the payment. Override Check Date: Override the check date.
View EOB: View the EOB associated with the selected ERA.
Select an ERA from the list or by using the Find in Table field.
Click Start/Continue Review. View the details of the payment.
Note: You will see a warning "Multiple Payers may match this ERA" if there are any other possible payers that may be an alternative payer.Click the Edit link to edit the Payer.

Select "Recommended Payers" or select "All Payers" to select any payer on your list.
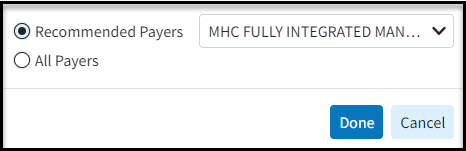
Once the payer information is updated, click Done.
Recommended Payers are only shown if they don’t match the currently selected payer and are one of the following:
The payer that matches the TCN (the payer the claim was sent to)
The payer that matches the member ID as sent on the ERA
The primary payer if the payment is a refund/reversal
The secondary and/or tertiary payer if there are any previous insurance payments on the claim
If necessary Resolve any Errors or Warnings by clicking on the icon in the status column. Please reference our Errors, Warnings, Informational Messages & Alerts Help Article to learn more.
Once all errors have been resolved and you have reviewed the ERA, click the Apply Payment button to post the payment.
 Sort your search results. Visit our
