If a patient requires pre-authorization for services before they’re rendered, this information can be tracked and stored on the payer level. Multiple authorization numbers can be associated with a payer, however; only one authorization can be used on the claim for that specific payer.
 A pop-up alert will display when an authorization number has passed its expiration date but has not been inactivated. Please contact the payer directly if an Authorization Number is required for the services you’re rendering.
Select Patient > Patient.
Use the Search field to search through your patients.
Select the Patient.
Click the Insurance Info tab.
Click on Payer to expand the list of payers.
Click Add next to authorizations. Or for an existing authorization click
 (Edit).
Enter the Authorization #.
Select the Referral Type from the drop-down.
 The Referral Type will always default to Prior Auth Number (Payer Authorization), but a Referral Number (from the Primary Care Physician) can be selected instead. This selection will copy over if the authorization is pulled into the claim.
Set the Visits Authorized & Visits Used.
Enter the Start Date & End Date.
Place a check in the box to show an alert before the authorization expires.
Write a Description for this authorization.
Click Add.
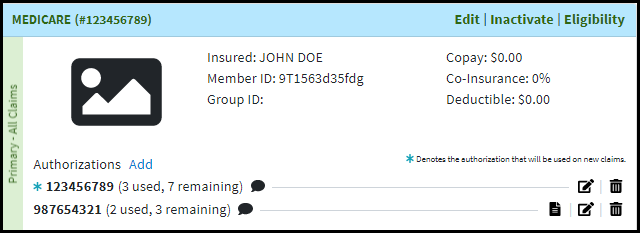
 When multiple authorizations exist you can choose which authorization will display on new claims.
The default Authorization will be indicated with the
 icon.
icon.To make another Authorization the default on claims, click the
 icon. Want to automatically populate a patient's default authorization information on new claims? Visit our Claim Settings Help Article to turn on this setting.
Click Save.
 The Referral Type will always default to Prior Auth Number (Payer Authorization), but a Referral Number (from the Primary Care Physician) can be selected instead. This selection will copy over if the authorization is pulled into the claim.
 When multiple authorizations exist you can choose which authorization will display on new claims.