The Manage Account screen gives you the ability to refund an Insurance account credit. If an insurance makes a payment over the charge amount, or a payment not associated to a specific charge an insurance credit will be created. These credits can later be applied to any outstanding balance. In some cases an insurance company may request these funds back, if that happens you are able to refund the credits to reflect the request in CollaborateMD.
Select Patient > Manage Account.
Use the Search field to search through your patients or insured.
 Place a check in the “Include inactive patients” box to include inactive patients in your search results.
Select the Patient.
Under Account Credit Listing locate the Credit under Credits Due Insurance.
 Sort your search results. Visit our Reorder Table Columns Help Article for detailed steps on how to hide, rearrange or add header columns.
Click the Refund button.
Enter the Refund Amount.
Enter the Refund Date.
Add a Memo Line.
Click Done.
Want to maximize the use of your screen space? Collapse or un-collapse the Transaction Listing or Account Credit Listing windows by clicking the icon.
icon.
Click Save.
 Place a check in the “Include inactive patients” box to include inactive patients in your search results.
 Sort your search results. Visit our
 The Manage Account screen gives you the option to move an account credit from one patient to another patient. Normally this occurs if you need to move a credit from one family member to another, or from a dependant to the guarantor.
Select Patient > Manage Account.
Use the Search field to search through your patients or insured.
Place a check in the “Include inactive patients” box to include inactive patients in your search results.Select the Patient.
Under Account Credit Listing locate the Credit.
Sort your search results. Visit our Reorder Table Columns Help Article for detailed steps on how to hide, rearrange or add header columns.Click the Transfer To… button.
Enter the Transfer Amount.
Enter the Transfer Date.
Add a Memo Line.
Locate the Patient to transfer the credit to.
Optional: Click Apply Credit to apply the credit to a charge within the same transaction.
Click Done.
Want to maximize the use of your screen space? Collapse or un-collapse the Transaction Listing or Account Credit Listing windows by clicking theicon.
Click Save.
The Manage Account screen gives you a shortcut to apply any account credit. If an insurance company or patient makes a payment over the charge amount, or a payment not associated to a specific charge an account credit will be created. This account credit can later be applied to an outstanding charge.
In needed, reference our Apply Credits Help Article for more detailed instructions on how to apply account credits.
Select Patient > Manage Account.
Use the Search field to search for the patient.
Place a check in the “Include inactive patients” box to include inactive patients in your search results.Select the Patient.
Under Account Credit Listing locate the Credit.
Sort your search results. Visit our Reorder Table Columns Help Article for detailed steps on how to hide, rearrange or add header columns.Click the Apply Credit button.
Apply the payment to one of the available charges using one of the two methods.
Click the Apply Remaining link to automatically to the patient’s oldest outstanding charge.
Locate a specific charge and enter the payment amount into the Apply Credit column.
Click Save Payment.
Want to maximize the use of your screen space? Collapse or un-collapse the Transaction Listing or Account Credit Listing windows by clicking theicon.
Click Save.
Select Patient > Manage Account.
Use the Search field to search for the patient.
Place a check in the “Include inactive patients” box to include inactive patients in your search results.Select the Patient.
Under Account Credit Listing locate the Credit.
Sort your search results. Visit our Reorder Table Columns Help Article for detailed steps on how to hide, rearrange or add header columns.To update the received date, click the
 icon and use the calendar to select a new date.
 Use the Due To, use the drop-down menu while selecting the insurance or patient credit.
Insurance Credits: Select the payer the credit is due to, or select patient to create a patient credit.
Patient Credits: Select a payer this credit is for to make an insurance credit.
Add/edit text in the Status / Memo column to update the credit memo.
Want to maximize the use of your screen space? Collapse or un-collapse the Transaction Listing or Account Credit Listing windows by clicking theicon.Click Save.
 icon and use the calendar to select a new date.
 The Manage Account screen gives you the option to delete an account credit from a patient's account. This is commonly used only if an account credit was created in error. If you need to move an account credit to another patient or refund a credit back to the patient or insurance company please reference our Transfer an Insurance or Patient Credit To Another Patient or Refund an Insurance Credit Help Articles
 Deleting an account credit will also delete any instances where the credit was applied and the payment or adjustment that created it.
Select Patient > Manage Account.
Use the Search field to search through your patients or insured.
Place a check in the “Include inactive patients” box to include inactive patients in your search results.Select the Patient.
Under Account Credit Listing locate the Credit.
Sort your search results. Visit our Reorder Table Columns Help Article for detailed steps on how to hide, rearrange or add header columns.Check the Delete Account Credit box.
Want to maximize the use of your screen space? Collapse or un-collapse the Transaction Listing or Account Credit Listing windows by clicking theicon.Click Save.
The Account Credit Listing within Manage Account gives you the ability to apply unapplied patient copay credits to matching charges as long as the Unapplied Copay and Claim DOS match and the claim has an available copay balance.
In needed, reference our Apply Credits Help Article for more detailed instructions on how to apply account credits.
Select Patient > Manage Account.
Use the Search field to search for the patient.
Place a check in the “Include inactive patients” box to include inactive patients in your search results.Select the Patient.
Under Account Credit Listing locate the Unapplied Copay Credit.
Sort your search results. Visit our Reorder Table Columns Help Article for detailed steps on how to hide, rearrange or add header columns.Click
 .
. The DOS entered must match the claim DOS in order to apply the credit.
Locate a specific charge and enter the credit amount into the Apply Credit column.
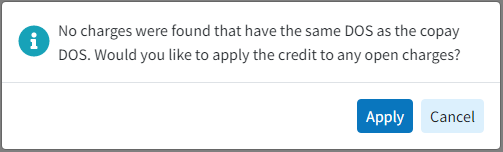
Note: If no charges exist with the copay's same DOS, the credit can be applied to any other charges by selecting Apply. If keeping the credit to use at a later time, select Cancel.
Click Done.
Want to maximize the use of your screen space? Collapse or un-collapse the Transaction Listing or Account Credit Listing windows by clicking theicon.Click Save.
