Certain types of Provider Level Adjustments, like Interest amounts, will automatically associate with any corresponding claims on the payment and will create a Claim Note indicating the amount of interest associated with that claim. Users can also manually associate Provider Level Adjustments to one or more claims in order to have the system create these notes.
Select Payment > ERA.
Enter your Search Criteria.
Click the Search button.
Optional: Click the
 icon to edit your search criteria.
 Sort your search results. Visit our Reorder Table Columns Help Article for detailed steps on how to hide, rearrange or add header columns.
Select an ERA from the list or by using the Find in Table field.
Click Start/Continue Review.
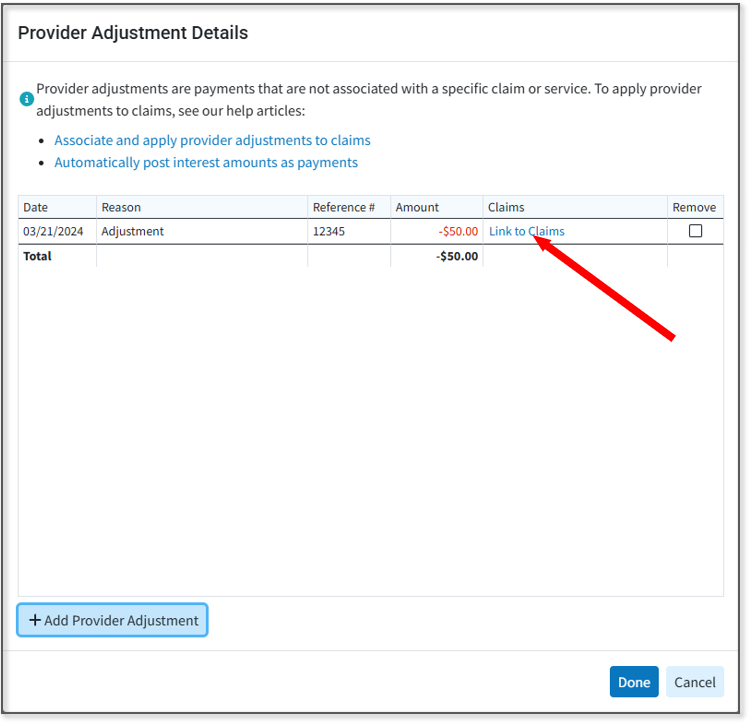
From the details of the payment, click the Show Details link to view the provider adjustment details.

Click the Link to Claims link.
Use the
 option to link a claim associated with the payment.
Use the
 option to link a claim that is not associated with the ERA payment. Users can view all claims that are linked to an adjustment, as well as add/remove, any additional claims.
Associating a claim with a provider adjustment will add a note to that claim for tracking purposes; however, it will not automatically associate an amount with that claim in reports. If your workflow requires applying a provider-level adjustment to a claim balance, you can manually enter the amount into the "Apply to Claim Balance" column.
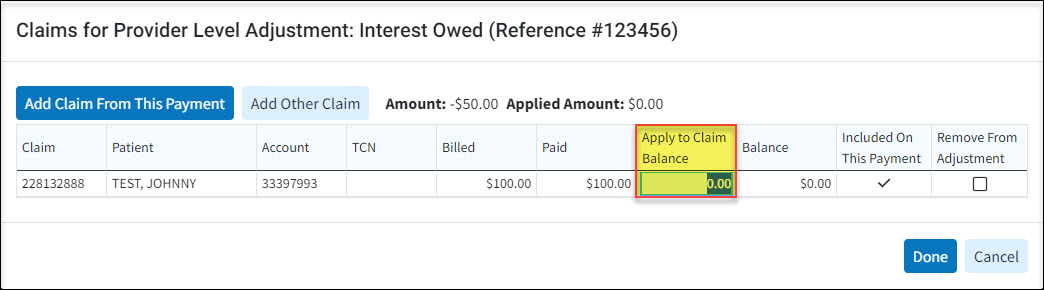 Note: Applying a provider adjustment to a claim balance will appear as an applied amount in reports, not as a provider adjustment.
Click Done.
(Optional) You can remove the adjustment from the ERA by checking the Remove box. Otherwise, click Done.
A Removed adjustment will be marked as deleted and will not show on the payment after it has been saved. It will also not be included in the Provider Adjustments total shown on the main summary screen. Users can uncheck the Remove button as long as the payment has not been applied.
If necessary Resolve any Errors or Warnings by clicking on the icon in the status column. Please reference our Errors, Warnings, Informational Messages & Alerts Help Article to learn more.
Other Available Actions:
Save and Apply Later: Saves your progress on the ERA allowing you to return later and apply the payment.
Restart ERA: Restarts all applied amounts and resolved errors.
Track: Track any claim or payment associated with this ERA.
View EOB Report: View the EOB associated with this ERA.
Documents: View or associate any new documents.
View Activity: View the activity screen for any patient on this check.
Once all errors have been resolved and you have reviewed the ERA, click the Apply Payment button to post the payment and adjustment.
 Sort your search results. Visit our

 option to link a claim associated with the payment.
 option to link a claim that is not associated with the ERA payment.
  Note: Applying a provider adjustment to a claim balance will appear as an applied amount in reports, not as a provider adjustment.