Select Appointments > Scheduler.
Type in the patient name or comment related to the appointment in the Search for appointments by patient or comment field. Or click the Advanced Search field and use the filters to narrow down your search.
When the appointment(s) is displayed, right-click on the appointment and select Edit Appointment or click on the appointment and select the Edit button.
 Click the
  button to display your results in a table format.
 Optional: Make any necessary changes to the appointment.
You also have the ability to change an appointment's duration by clicking the bottom edge of the appointment and dragging it up (shorter) or down (longer).Click Save .
 Click the
 Select Appointments > Scheduler.
Find the appointment on the calendar.
Right-click the appointment and select Update Status.
Select the new status for the appointment.
Appointments can be moved to a new time slot or day for the same resources. Please note that you are unable to move appointments to a new time or day for a different resource. To do so, Edit the appointment and change the Resource.
Select Appointments > Scheduler.
Find the appointment on the calendar.
Appointments can be moved one of two ways:
You also have the ability to change an appointment's duration by clicking the bottom edge of the appointment and dragging it up (shorter) or down (longer).Right-click on the appointment and select Move Appointment.
Click on the time slot you want to move the appointment to, or right-click and select Move appointment to <date>.
Verify the appointment listed is the appointment you'd like to move, and select Continue to confirm the move.
Optional: You can also click on the appointment to Drag and drop the appointment to the new time slot or resource (the appointment setting nees to be turnd on . Enable drag-and-drop in the scheduler:
Optional: You can also click on the appointment to Drag and drop the appointment to the new time slot or resource. In order to use the drag-and-drop feature, the Appointment Setting for User to "Enable drag-and-drop in the scheduler:" must be turned on.

Have an appointment on your waiting list that can be scheduled in this time slot? You will receive the following message “One on more patients were found on the appointment waiting list who can now be scheduled for an appointment. Would you like to schedule one now?”
- Click Schedule.
- Select the appointment request you wish to create the appointment for.

Appointments can be rescheduled to a new time slot or day for the same resource. Rescheduling will change the status of the original appointment to “Rescheduled” and create a new appointment in the selected time slot. Please note that you are unable to reschedule appointments to a new time or day for a different resource. You cannot reschedule or move an appointment(s) to a new time or day for a different resource. To do so, Edit the appointment and change the Resource.
Select Appointments > Scheduler.
Find the appointment on the calendar.
Right-click the appointment and select Reschedule Appointment.
When the confirmation window opens, verify the appointment listed is the appointment you would like to reschedule/move and select the new time and date.
Have an appointment in your waiting list that can be scheduled in this time slot? You will receive the following message “One on more patients were found on the appointment waiting list who can now be scheduled for an appointment. Would you like to schedule one now?”
- Click Schedule.
- Select the appointment request you wish to create the appointment for
In the event an appointment is created by accident, you can mark the appointment status as "deleted."
 If a patient cancels their appointment, we recommend changing the appointment status to "canceled "for better reporting purposes.
Select Appointments > Scheduler.
Find the appointment on the calendar.
Right click on the appointment and select Update Status.
Select Deleted.
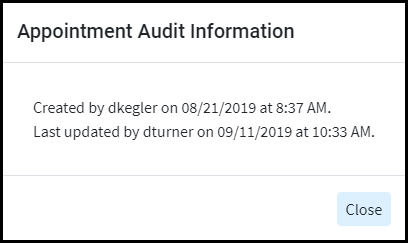
Quickly identify a history of any changes made to an appointment by viewing the Appointment Audit.
Select Appointments > Scheduler.
Find the appointment on the calendar.
Right click on the appointment and select Edit Appointment.
Click the More button.
Select View Appointment Audit.