DNS cache is like an address book saved on your computer with the domain name server (DNS) information of each website you visit. DNS or Domain Name Server is a technology that tells your computer the IP address associated with a domain name. Saving the DNS information in a local DNS cache helps your browser quickly find a website.
Once you enter a website address in your browser, it will look for DNS information in the local cache first. If it finds the directions, then it uses the DNS cache to visit the website. On the other hand, if the information is not in the local DNS cache, then the browser will get it from other DNS servers across the internet. This ensures that every time you visit any website, your browser takes the shortest route to get the DNS information it needs to locate the website on the internet.
As part of our scheduled maintenance, we will be updating the DNS for our application. Most users will not have any issues with this, as their computers will automatically updated with the DNS. If you are unable to access the application after the the scheduled maintenance you might need to manually clear your DNS info for CMD.
Please reference the following help articles for step by step instructions.
Click on the Windows Start
 icon.
icon.Locate and open the CMD (Command Prompt) tool.
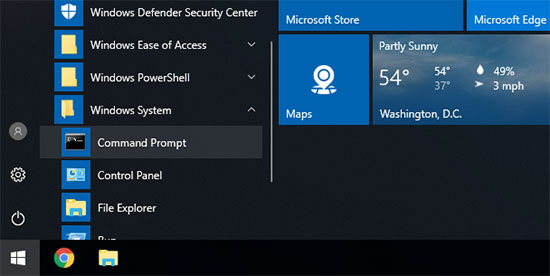
Enter the following text into the command prompt window: ipconfig /flushdns
Press the Enter key.
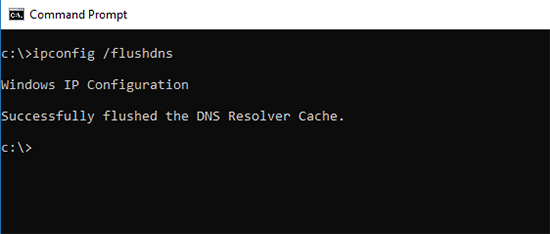
Your DNS should now be cleared.
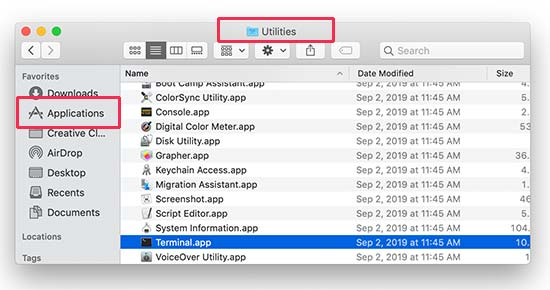
Navigate to Applications > Utilities
Locate and open the Terminal App.
Enter the following command: sudo killall -HUP mDNSResponder
Press the Enter key.
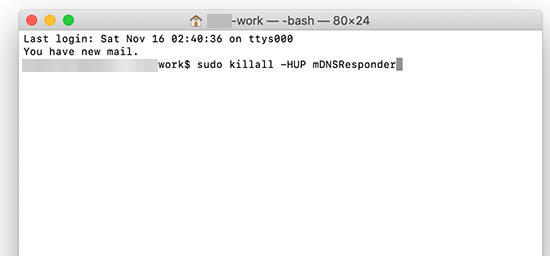
Enter your macOS account password.
Your DNS should now be cleared.
Google Chrome also keeps a DNS cache of its own, and it is separate from the DNS cache stored by your operating system.
If you use Google Chrome as your main browser, then you’ll need to clear Chrome’s DNS cache as well.
Enter the following address into the url field: chrome://net-internals/#dns
Within the DNS section click the Clear host cache button.
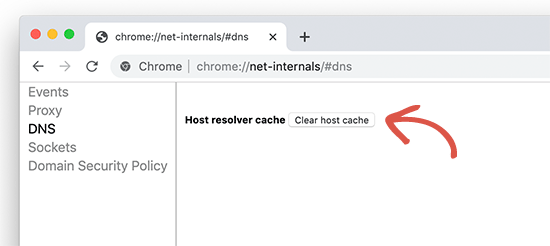
Your DNS should now be cleared.
Firefox also keeps a DNS cache of its own, and it is separate from the DNS cache stored by your operating system.
If you use Firefox as your main browser, then you’ll need to clear Firefox’s DNS cache as well.
Enter the following address into the url field: about:config
Click I accept the risk
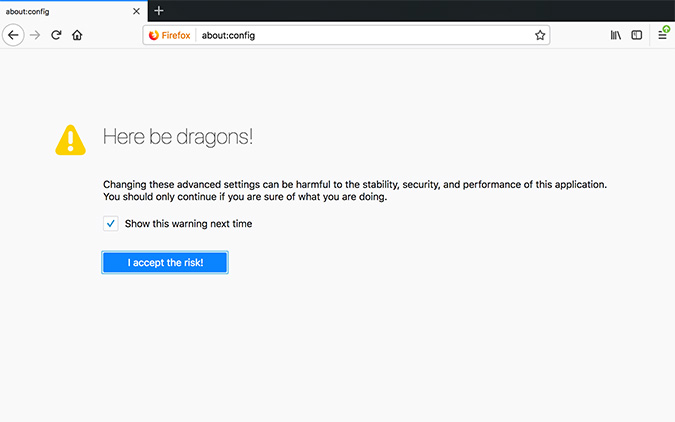
Within the next window, enter network.dnsCacheExpiration within the search bar
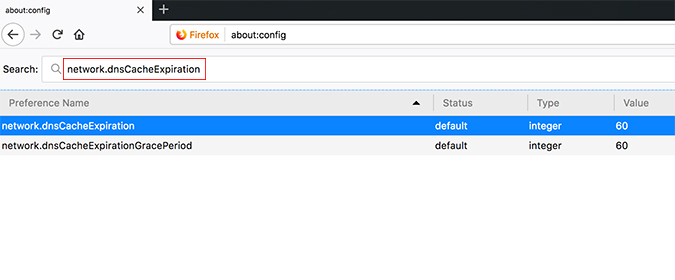
Click within the value for both of the two results, and set the value to 0.
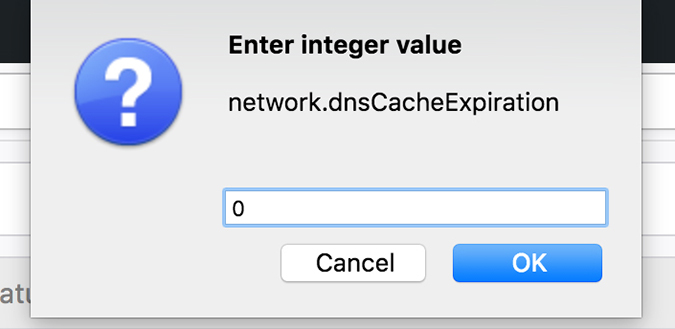
Your DNS should now be cleared.
Repeat step 4 and set the values to 60.
Safari also keeps a DNS cache of its own, and it is separate from the DNS cache stored by your operating system.
If you use Safari as your main browser, then you’ll need to clear Safari’s DNS cache as well.
Within Safari click Command+
Navigate to the Advanced Tab.
Check the Show Develop menu in menu bar option.
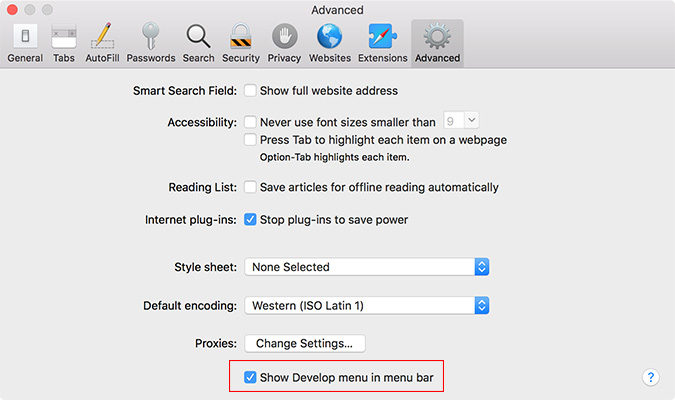
Now you should have a new Develop option in your menu bar. Select Develop, then Empty Caches.
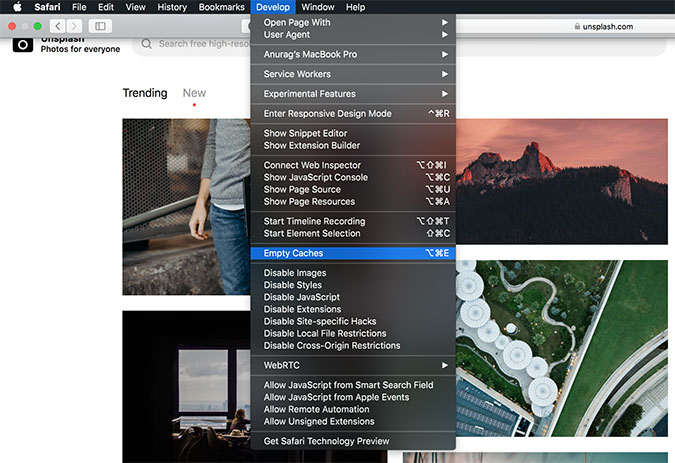
Your DNS should now be cleared.
Microsoft Edge also keeps a DNS cache of its own, and it is separate from the DNS cache stored by your operating system.
If you use Edge as your main browser, then you’ll need to clear Edge's DNS cache as well.
Enter the following address into the url field: edge://net-internals/#dns
Within the DNS section click the Clear host cache button.
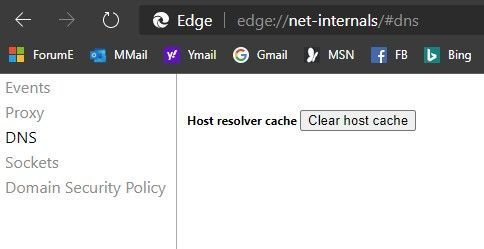
Your DNS should now be cleared.
 icon.
icon.


