Follow the steps below to search for current or previously sent Broadcast Campaign Communications.
-
Select Patient > Communications... > Campaign Tracking.
-
Enter your desired Search Criteria.
-
Sent Date: Use this to select the date or date range to return in the search.
-
Campaign Template: Use this to select a specific Campaign Template to return in the search.
-
Patient Search Options: Use these fields to select specific patient details to return in the search.
-
-
Click Search.
-
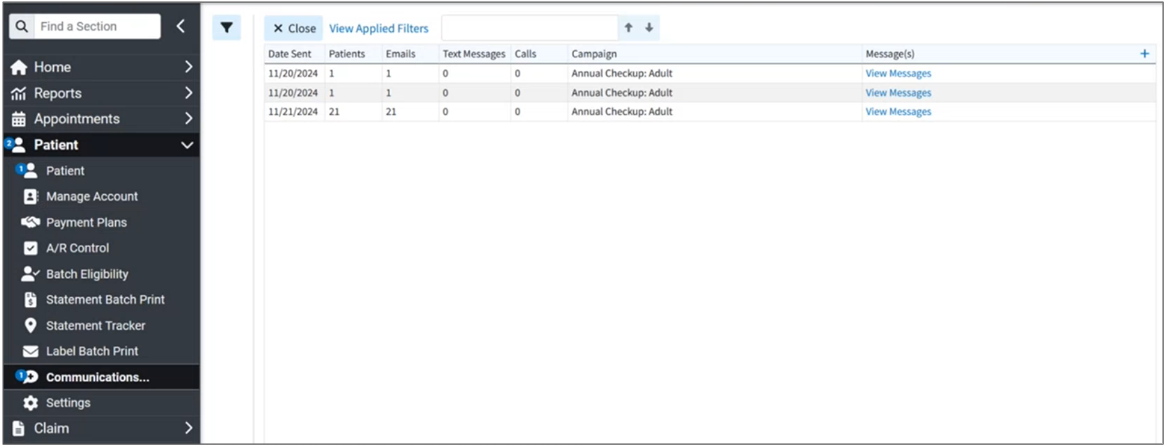
A list of all the campaigns that meet your search criteria will be displayed.

 Sort your search results. Visit our Reorder Table Columns Help Article for detailed steps on how to hide, rearrange, or add header columns.
 -
Optional: You can click "ViewMessages" for a particular campaign to see the message content.
-
Click the campaign line you want to open to see a list of all the patients who received (or will receive) a message. The header will include the Campaign #, the Template Name, and the Scheduled Date of the campaign. This table also includes the following columns:
Method: Displays how the message was sent (via email or text). The method used will be determined by the patient's communication preferences, which are found under the Communications section of the Patient information, or the patient portal. Please note that the email address used will be the one associated with the Patient Portal account. If the patient is not registered in the portal, then the email address linked to their patient account will be used instead.
Language: Displays the language the message was sent in (English or Spanish). When the option to send messages in Spanish is chosen, the language used will be determined by the patient's Default language setting, which is found under the Meaningful Use section of the Patient information.
Destination: Displays where the message was sent (Patient's email address or patient's cell phone number).
Message: Displays a "View Message" hyperlink that allows the user to see the full text of the message that was sent.
Patient Name: Displays the name of the patient to whom the message was sent.
Account #: Displays the patient's account number for the individual the message was sent to.
Status: Displays the status of the campaign message ( Scheduled to be sent, Sent, etc.).
Click Close to exit.
You can send/create a new campaign using the patient list from a previously used campaign. Follow the steps below to search for a current or previously sent Broadcast Campaign list and start a new campaign based on that list.
-
Select Patient > Communications... > Campaign Tracking.
-
Enter your desired Search Criteria.
-
Sent Date: Use this to select the date or date range to return in the search.
-
Campaign Template: Use this to select a specific Campaign Template to return in the search.
-
Patient Search Options: Use these fields to select specific patient details to return in the search.
-
-
Click Search.
-
A list of all the campaigns that meet your search criteria will be displayed.

 Sort your search results. Visit our Reorder Table Columns Help Article for detailed steps on how to hide, rearrange, or add header columns.
 -
Click the campaign line you want to open to see a list of all the patients who received (or will receive) the message.
-
Click Start a New Campaign From This List.
-
Use the Campaign Search Field to search through the existing campaigns and select the template you want to use.
-
Alternatively, you can click Start Campaign to add a new campaign from scratch.
-
-
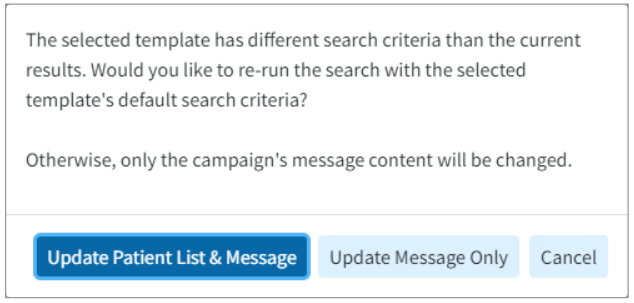
If using a template, make one of the following selections:

-
Update Patient List & Message: Select this option to update the patient list and message from the template.
-
Update Message Only: Select this option to Only update the message from the template, but leave the patient list the same.
-
- Modify the "Send Message On" date and time to specify when you want the message to be sent.

 Please note that when scheduling a campaign communication it must be scheduled at least 5 minutes in the future.
 -
Click Start Campaign.
-
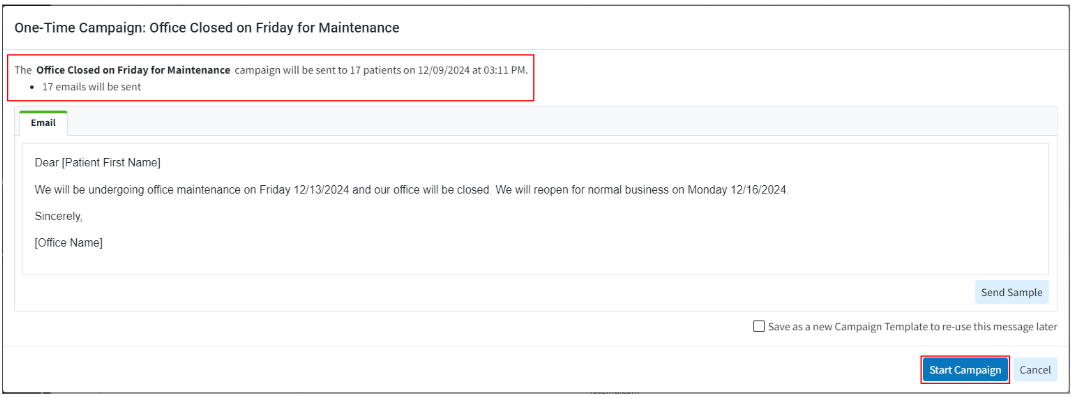
The preview window displays the campaign and template title, the number of patients who will receive the message, the date and time of the scheduled send, how they will be sent, and a preview of the message that will be sent. When finished click Start Campaign.

 Your campaign is now scheduled to be sent on your selected date/time. Please visit our Track a Campaign Help Article to see any existing or scheduled campaign messages.
You can stop a scheduled campaign from being sent out. Follow the steps below to search for a scheduled Broadcast Campaign and stop the messages from being sent.
-
Select Patient > Communications... > Campaign Tracking.
-
Enter your desired Search Criteria.
-
Sent Date: Use this to select the date or date range to return in the search.
-
Campaign Template: Use this to select a specific Campaign Template to return in the search.
-
Patient Search Options: Use these fields to select specific patient details to return in the search.
-
-
Click Search.
-
A list of all the campaigns that meet your search criteria will be displayed.

 Sort your search results. Visit our Reorder Table Columns Help Article for detailed steps on how to hide, rearrange, or add header columns.
 -
Click the campaign line you want to open to see a list of all the patients who are scheduled to receive the message.
-
Click Stop Campaign.
 Please note that you can only stop scheduled campaigns that have not been sent out yet.

 Sort your search results. Visit our

 Please note that when scheduling a campaign communication it must be scheduled at least 5 minutes in the future.
 Your campaign is now scheduled to be sent on your selected date/time. Please visit our Track a Campaign Help Article to see any existing or scheduled campaign messages.